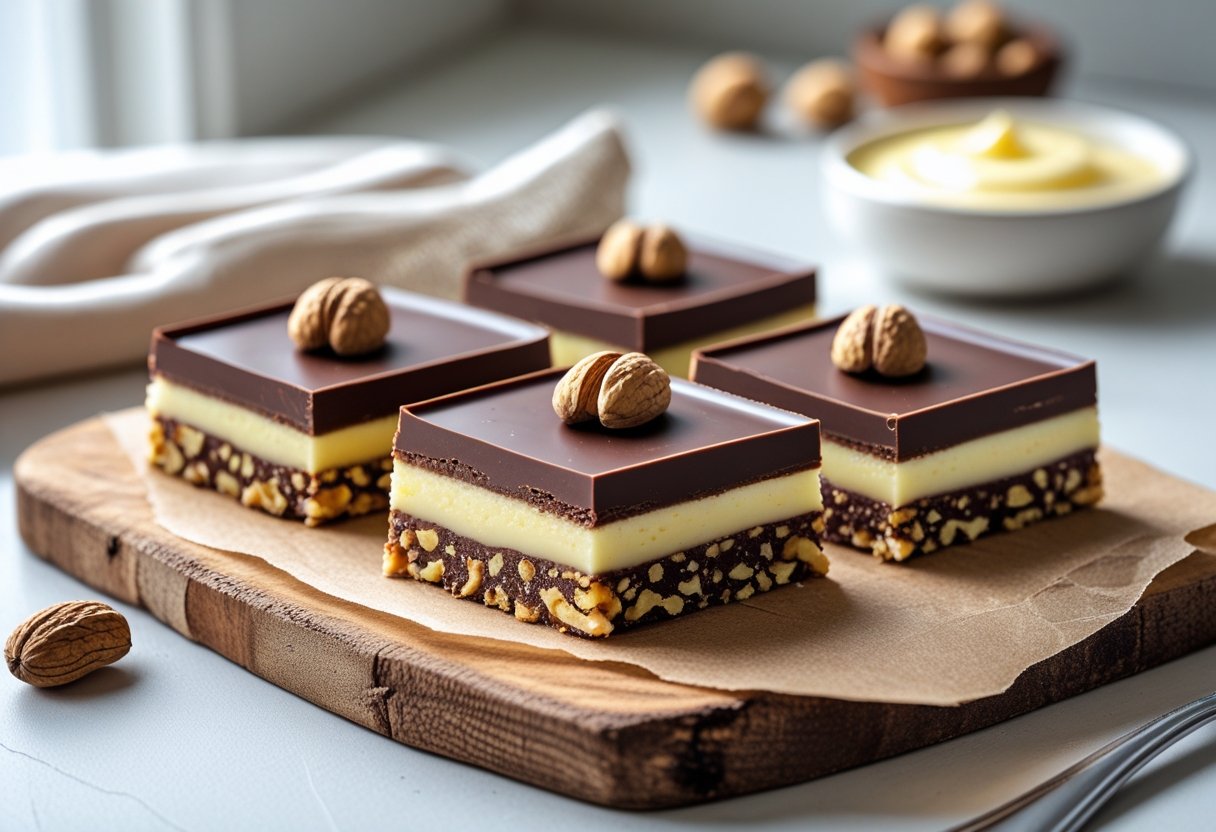
Nanaimo bars are a delicious no-bake dessert that’s easy to make with just a few simple ingredients. These bars have three tasty layers: a crunchy coconut and graham cracker base, a smooth custard filling, and a rich chocolate topping.
This recipe gives us a sweet treat that’s perfect for sharing and doesn’t require any oven time. Honestly, your oven will thank you for the day off.
Making Nanaimo bars is fun because each layer brings a different flavor and texture. You can customize the filling and topping to suit your taste or keep it classic for that true Canadian experience.
They store well in the fridge or freezer, making them a great option for preparing ahead. No need to panic if you want dessert ready before your guests arrive.
Whether you’re new to Nanaimo bars or looking for tips to improve your version, this recipe has you covered. It’s a simple way to enjoy a rich, layered dessert that’s sure to impress at any gathering.
Key Takeaways
- Nanaimo bars are a no-bake treat with three distinct layers.
- The recipe is easy to make and can be customized.
- These bars store well and are great for preparing in advance.
Nanaimo Bars Recipe & Layer Breakdown
Nanaimo bars have three layers that work together to make this dessert special. Each layer has different ingredients and textures.
We’ll cover what goes into each layer, how to prepare them step by step, and share tips to get the best results. Let’s get layering!
Ingredients for Each Layer
The bottom layer is a crunchy base made of melted butter, sugar, cocoa powder, egg, graham cracker crumbs, sweetened shredded coconut, and chopped walnuts. The butter and egg help hold everything together.
The middle layer is a creamy custard filling made with softened unsalted butter, confectioners’ sugar, custard powder (or sometimes instant vanilla pudding mix), a splash of milk, and vanilla for flavor.
The top layer is a smooth, firm chocolate glaze made of melted semisweet chocolate mixed with a little butter. This layer seals the bars and adds a rich chocolate taste.
Step-by-Step Preparation
First, mix the base ingredients by melting butter with sugar and cocoa powder. Whisk in the egg to cook slightly before stirring in graham crumbs, coconut, and walnuts.
Press this mixture into the pan and chill it until firm. Go ahead, give it a little pat—it’s earned it.
Next, whip the butter and confectioners’ sugar together until light. Add custard powder, milk, and vanilla, beating until smooth.
Spread this custard filling evenly over the chilled base and chill again until set. Patience is a virtue, especially when dessert is involved.
Finally, melt chocolate with butter until glossy. Pour this over the chilled custard layer and chill the bars until the top is firm.
Tips for Success
Make sure the base layer is fully cool before adding the custard, or the layers might mix. The custard filling must be chilled well so it’s firm before the chocolate goes on.
Use softened unsalted butter for the custard to get a smooth texture. If you can’t find custard powder, instant vanilla pudding mix works but will change the flavor a bit.
For clean cuts, chill the bars thoroughly. Warm your knife with hot water between cuts to avoid cracking the chocolate top.
These small steps help get neat, tasty bars every time. Learn more about the detailed ingredients and preparation at this layer by layer recipe guide.
Serving, Storage, and Variations
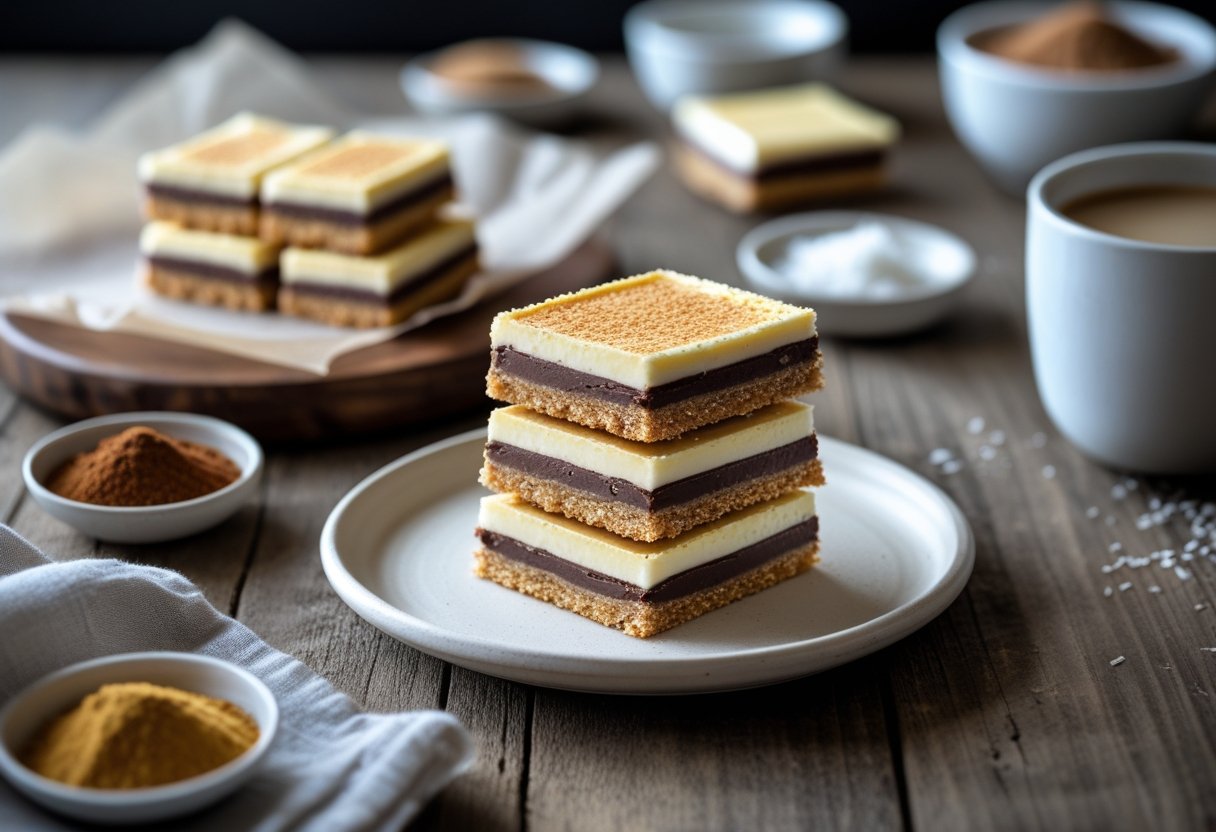
Nanaimo bars are best enjoyed when served right and stored properly. Cutting them carefully keeps the layers neat.
Storing them well preserves freshness, and freezing lets us prepare ahead. Plus, there are fun ways to mix up the classic recipe.
Cutting and Serving Suggestions
We want to keep the layers clean and perfect when we cut Nanaimo bars. Use a sharp knife dipped in hot water, then wiped dry before slicing.
This helps the chocolate top crack less and the custard filling stay smooth. Your bars will look so good, you might not want to share (but you should).
Cut the bars into small squares or rectangles, about 2 inches wide. That makes them easy to handle and share.
Serve them chilled or at room temperature—chilling firms the custard and chocolate, making the bars easier to cut and eat. No one likes a custard landslide.
For serving, placing them on a pretty plate or a tiered dessert stand shows off the layers. Garnishing with a light dusting of cocoa or some coconut flakes on top can add a nice touch without hiding the classic look.
How to Store Nanaimo Bars
Since Nanaimo bars have a creamy custard filling, storing them right is key. Keep them in an airtight container in the fridge.
This stops the chocolate from melting and keeps the custard firm. In the fridge, Nanaimo bars stay fresh for about a week.
If we leave them out at room temperature, it’s best to eat them within a day or two to prevent the custard from getting too soft. Trust us, soft custard and warm hands are not a good combo.
When stacking bars, placing parchment paper between layers stops them from sticking together. Also, bring them out of the fridge about 10 minutes before serving.
This softens the chocolate and lets the custard flavor shine through. Enjoy—and try not to eat them all at once!
Freezing and Make-Ahead Tips
We can freeze Nanaimo bars to enjoy them later. Wrap them tightly in plastic wrap, then foil to prevent freezer burn.
Frozen bars last up to three months this way. When ready to eat, thaw them in the refrigerator overnight.
This keeps the layers firm and prevents condensation from messing with the texture. Making Nanaimo bars ahead of time is great for parties or gifts.
Prepare the bars, freeze, and then thaw and serve on the day of your event. This no-bake dessert is perfect for planning ahead—no oven mitts required!