I’ll be honest—these chocolate crunch bars disappear faster than almost anything else I make. There’s something about that perfect combination of crispy rice cereal and rich, melted chocolate that makes them absolutely irresistible. I’ve made batch after batch of these over the years, and they never fail to hit the spot when you need something sweet, crunchy, and satisfying.
What I love most about this recipe is how simple it is. We’re talking five basic ingredients that you probably already have in your pantry, about 10 minutes of active work, and then just waiting for them to set in the fridge. No baking required, no complicated techniques—just straightforward, delicious homemade treats that taste way better than anything you’d buy at the store.
Why These Bars Work So Well
The magic here is in the simplicity. When you melt chocolate chips with a bit of peanut butter (or almond butter if that’s your preference) and butter, you create this smooth, glossy coating that binds everything together. The crispy rice cereal adds that satisfying crunch, and a pinch of salt balances out the sweetness perfectly.
I’ve experimented with different variations over time—adding chopped nuts, dried cranberries, a sprinkle of sea salt on top—and they all work beautifully. But the base recipe is so good on its own that sometimes I don’t even bother with extras. It just depends on what I’m in the mood for or what I have on hand.
The Complete Recipe
What You’ll Need
Base Ingredients:
- 2 cups crispy rice cereal (I use regular Rice Krispies)
- 1 cup chocolate chips (milk or dark—your choice)
- ¼ cup peanut butter or almond butter
- 1 tablespoon butter
- ¼ teaspoon salt
Optional Add-Ins (Pick Your Favorites):
- Chopped nuts (almonds, pecans, or walnuts)
- Dried fruit (cranberries, cherries, or raisins)
- Mini chocolate chips for extra chocolate
- Flaky sea salt for sprinkling on top
- Sprinkles if you’re making these for kids
Step-by-Step Instructions
Step 1: Prep Your Pan
Line an 8×8 inch baking dish with parchment paper, making sure to leave some overhang on the sides. This makes it so much easier to lift the bars out later for cutting. Trust me—I learned this the hard way after trying to cut bars directly in the pan and making a mess.
Step 2: Melt the Chocolate Mixture
In a microwave-safe bowl, combine your chocolate chips, peanut butter, and butter. Microwave in 30-second intervals, stirring well between each one. This usually takes about 1.5 to 2 minutes total, depending on your microwave.
Here’s a tip I learned: don’t rush this step. If you overheat the chocolate, it can seize up and become grainy. Low and slow wins the race here. The mixture should be completely smooth and glossy when you’re done.
Step 3: Mix in the Cereal
Remove the bowl from the microwave and immediately stir in the crispy rice cereal. Work quickly but gently—you want every piece of cereal coated in that chocolate mixture, but you don’t want to crush the cereal. I use a rubber spatula and fold everything together until it’s evenly combined.
Step 4: Press into the Pan
Pour the mixture into your prepared baking dish. Use your spatula (or lightly greased hands) to press it down evenly. Don’t press too hard—you want the bars to be compact enough to hold together, but not so compressed that they lose their crunch.
If you’re adding toppings like chopped nuts, sea salt, or extra chocolate chips, now’s the time to sprinkle them on top and gently press them in.
Step 5: Chill and Cut
Pop the pan in the refrigerator for at least 1 hour, or until the bars are completely firm. I usually make these in the morning and let them chill while I’m doing other things, then cut them in the afternoon.
Once they’re set, use the parchment paper overhang to lift the whole block out of the pan. Place it on a cutting board and use a sharp knife to cut into squares. I usually get 16 bars from this recipe, but you can cut them larger or smaller depending on your preference.
Tips I’ve Learned Along the Way
Chocolate Choice Matters: I’ve made these with both milk chocolate and dark chocolate chips. Milk chocolate makes them sweeter and more kid-friendly, while dark chocolate gives them a more sophisticated flavor with less sweetness. Both are delicious—it just depends on your taste.
Nut Butter Flexibility: Peanut butter is classic, but almond butter works just as well. I’ve even used cashew butter when that’s what I had on hand. Each one gives a slightly different flavor, but they all work.
Don’t Skip the Salt: That ¼ teaspoon of salt might seem small, but it makes a huge difference. It balances the sweetness and makes all the flavors pop. If you’re using salted butter or salted nut butter, you might want to reduce it slightly, but don’t skip it entirely.
Storage is Key: These bars keep well at room temperature in an airtight container for about 3-4 days. In the refrigerator, they’ll last up to a week. I actually prefer them straight from the fridge—they’re firmer and the chocolate has a nice snap to it.
Make Them Your Own: This is one of those recipes where you can really get creative. Some of my favorite variations:
- Add ½ cup of chopped toasted almonds for extra crunch
- Mix in ¼ cup of dried cranberries for a tart contrast
- Sprinkle flaky sea salt on top before chilling for a sweet-salty combo
- Use half peanut butter and half Nutella for a hazelnut twist
- Add a teaspoon of vanilla extract to the melted chocolate for extra depth
Why These Bars Are a Kitchen Staple
I keep coming back to this recipe because it’s reliable, quick, and uses real ingredients—no corn syrup, no artificial flavors, just straightforward chocolate and cereal. When I need a last-minute dessert for a gathering, or when I want something sweet to have on hand for the week, these bars are my go-to.
They’re also incredibly forgiving. If your chocolate mixture is a little too thick, you can add a tiny bit more butter. If it’s too thin, add a bit more cereal. The ratios don’t have to be perfect, which makes this an ideal recipe for beginner cooks or for making with kids.
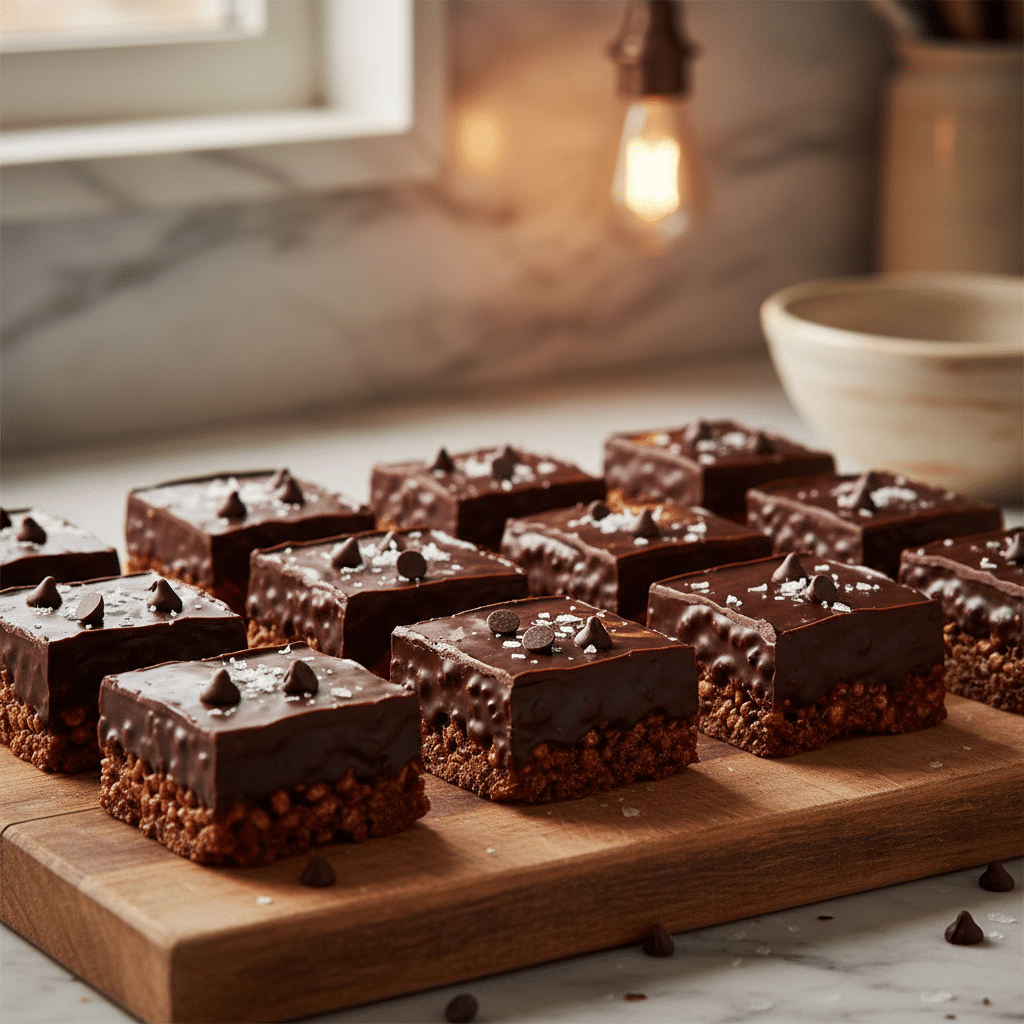
And let’s talk about how they look—when you cut them into neat squares and arrange them on a plate, they look impressive. The glossy chocolate coating, the visible texture of the cereal, maybe a sprinkle of sea salt on top—they’re simple but beautiful in their own way.
Serving Suggestions
These chocolate crunch bars are perfect on their own, but here are some of my favorite ways to serve them:
- With coffee or tea for an afternoon pick-me-up
- Alongside vanilla ice cream for a simple but satisfying dessert
- Packed in lunchboxes as a homemade treat
- On a dessert platter at parties (they always disappear first)
- With a cold glass of milk for a classic combination
The Bottom Line
If you’re looking for a simple, delicious treat that requires minimal effort and delivers maximum satisfaction, these chocolate crunch bars are it. They’re the kind of recipe you’ll make once and then keep in your regular rotation because they’re just that good.
No fancy equipment needed, no complicated techniques to master—just real ingredients, a few minutes of your time, and a little patience while they chill. The result is a homemade treat that’s infinitely better than store-bought and costs a fraction of the price.
Give these a try and let me know what you think! Do you prefer milk or dark chocolate? What mix-ins would you add?
Recipe Card
Homemade Chocolate Crunch Bars
Prep Time: 10 minutes
Chill Time: 1 hour
Total Time: 1 hour 10 minutes
Yield: 16 bars
Difficulty: Beginner-friendly
Ingredients:
- 2 cups crispy rice cereal
- 1 cup chocolate chips (milk or dark)
- ¼ cup peanut butter or almond butter
- 1 tablespoon butter
- ¼ teaspoon salt
- Optional: chopped nuts, dried fruit, sea salt, or sprinkles
Instructions:
- Line an 8×8 inch baking dish with parchment paper, leaving overhang on the sides
- In a microwave-safe bowl, combine chocolate chips, nut butter, and butter
- Microwave in 30-second intervals, stirring between each, until smooth (about 1.5-2 minutes total)
- Stir in crispy rice cereal until evenly coated
- Pour into prepared pan and press down evenly with a spatula
- Add optional toppings if desired
- Refrigerate for at least 1 hour until firm
- Lift out using parchment overhang and cut into 16 squares
- Store in an airtight container at room temperature (3-4 days) or refrigerated (up to 1 week)
Nutrition (per bar):
- Calories: 150
- Fat: 7g
- Protein: 2g
- Carbohydrates: 20g
Tips for Success:
- Don’t overheat the chocolate—use 30-second intervals and stir well
- Work quickly once you add the cereal so the mixture doesn’t harden
- Press gently to maintain the crunch
- Customize with your favorite mix-ins
- Store in the fridge for firmer bars with better snap