There’s something magical about the perfect piece of fried chicken. The golden-brown crust that crackles when you bite into it, revealing tender, juicy meat that practically falls off the bone. This isn’t just any fried chicken recipe – this is the culmination of Southern tradition, culinary science, and pure comfort food perfection.
The secret to extraordinary fried chicken lies not just in the frying technique, but in the careful preparation that begins hours before the oil even touches the pan. From the initial brine that ensures every fiber of the meat is seasoned and tenderized, to the double-coating method that creates that signature crunch, every step in this recipe has been crafted to deliver restaurant-quality results in your own kitchen.
What sets this recipe apart is the attention to detail that transforms ordinary chicken into something extraordinary. We’ll walk you through the science behind the perfect marinade, the art of achieving the ideal coating consistency, and the precise temperature control that ensures your chicken emerges from the oil with a shatteringly crisp exterior and impossibly moist interior.
Whether you’re planning a Sunday family dinner, preparing for a backyard gathering, or simply craving the ultimate comfort food experience, this recipe will become your go-to method for creating fried chicken that rivals the best restaurants and surpasses your fondest memories of homemade goodness.
Ingredients
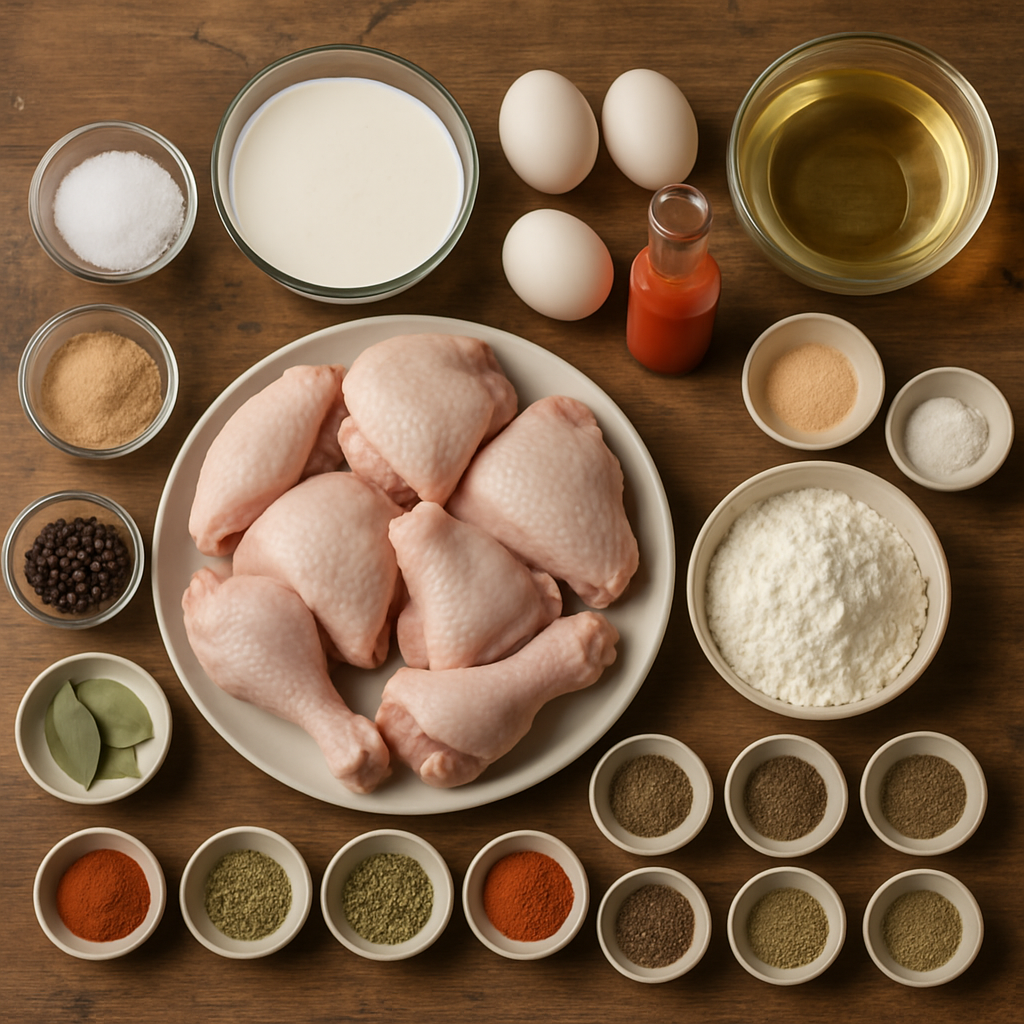
For the Chicken and Brine:
•1 whole chicken (3-4 pounds), cut into 8 pieces, or 3 pounds mixed chicken pieces (thighs, drumsticks, breasts, wings)
•8 cups water
•1/2 cup kosher salt
•1/4 cup brown sugar
•2 bay leaves
•1 tablespoon black peppercorns
•2 cups buttermilk
•2 large eggs
•2 tablespoons hot sauce (such as Frank’s RedHot)
•1 tablespoon garlic powder
•1 tablespoon onion powder
For the Seasoned Flour Coating:
•3 cups all-purpose flour
•1/2 cup cornstarch
•2 tablespoons paprika
•1 tablespoon garlic powder
•1 tablespoon onion powder
•1 tablespoon dried thyme
•1 tablespoon dried oregano
•2 teaspoons cayenne pepper (adjust to taste)
•2 teaspoons black pepper
•2 teaspoons white pepper
•1 tablespoon salt
•1 teaspoon celery seed
•1/2 teaspoon ground sage
For Frying:
•6-8 cups vegetable oil (or peanut oil for higher smoke point)
•Additional seasoned flour for final coating
Preparation Instructions
Step 1: Brining the Chicken (4-24 hours ahead)
The foundation of exceptional fried chicken begins with proper brining, a process that not only seasons the meat throughout but also helps retain moisture during the high-heat cooking process. In a large bowl or container, dissolve the kosher salt and brown sugar in the water, stirring until completely dissolved. Add the bay leaves and black peppercorns to infuse additional flavor into the brine.
Submerge the chicken pieces completely in the brine, ensuring each piece is fully covered. If necessary, weigh down the chicken with a plate to keep it submerged. Refrigerate for at least 4 hours, though overnight brining (up to 24 hours) will yield even more flavorful and tender results. The salt in the brine will penetrate the meat, breaking down proteins and creating space for moisture retention, while the sugar adds a subtle sweetness that balances the savory elements.
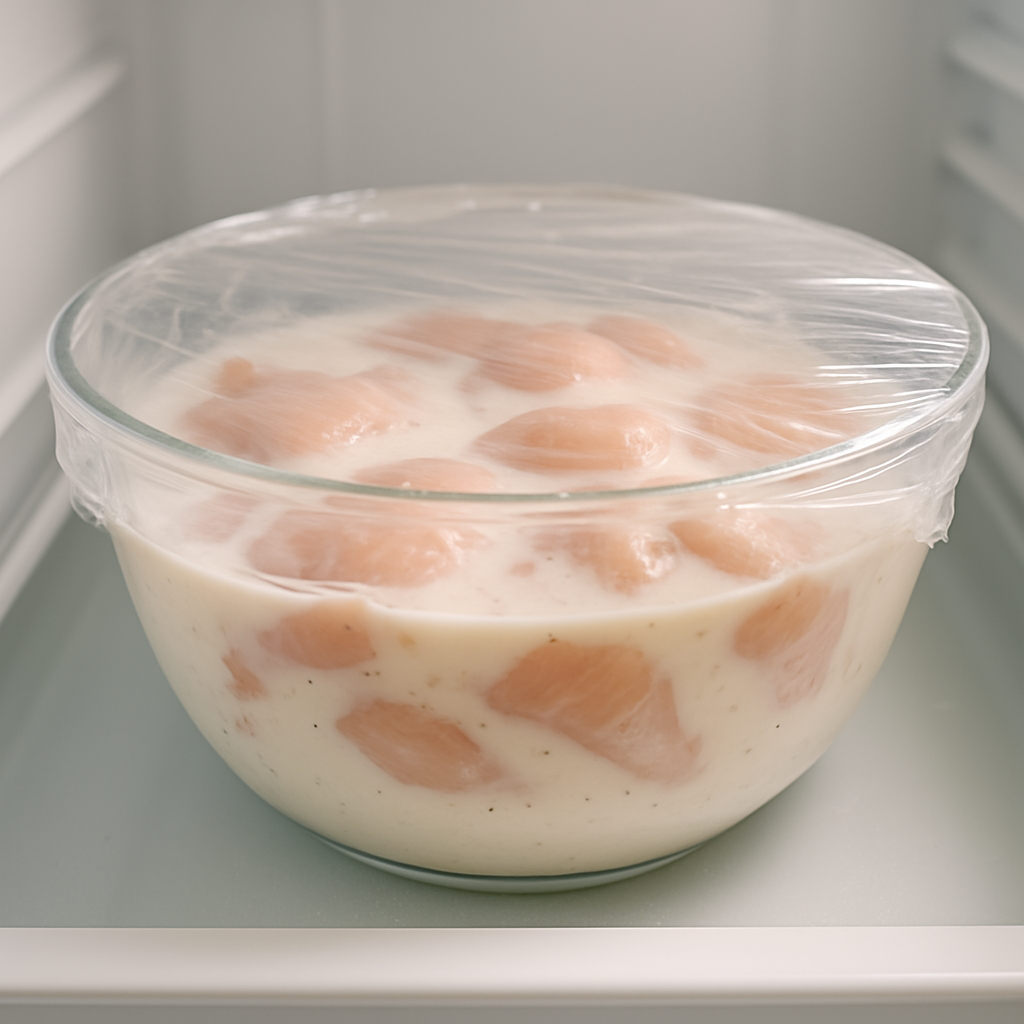
Step 2: Creating the Buttermilk Marinade
After brining, remove the chicken from the salt water and pat each piece completely dry with paper towels. This step is crucial – any excess moisture will prevent the coating from adhering properly and can cause dangerous oil splattering during frying.
In a large bowl, whisk together the buttermilk, eggs, hot sauce, garlic powder, and onion powder until smooth and well combined. The acidity in the buttermilk serves multiple purposes: it continues to tenderize the meat, adds tangy flavor, and creates the perfect base for the flour coating to adhere. The eggs act as a binding agent, while the hot sauce and spices infuse additional layers of flavor.
Submerge the dried chicken pieces in the buttermilk mixture, turning each piece to ensure complete coverage. Cover the bowl and refrigerate for at least 2 hours, or up to 8 hours. This secondary marination allows the flavors to penetrate deeper into the meat while the buttermilk continues its tenderizing work.
Step 3: Preparing the Seasoned Flour Coating
The secret to achieving that perfect, crackling crust lies in the flour mixture. In a large, shallow dish or bowl, whisk together all the dry coating ingredients: flour, cornstarch, paprika, garlic powder, onion powder, thyme, oregano, cayenne pepper, black pepper, white pepper, salt, celery seed, and sage.
The cornstarch is a crucial addition that many home cooks overlook – it creates an extra-crispy texture and helps the coating stay crunchy even as the chicken rests. The combination of spices creates a complex flavor profile that complements rather than overwhelms the chicken’s natural taste. The paprika provides color and mild sweetness, while the dual pepper approach (black and white) adds depth and heat.
Mix the flour blend thoroughly, ensuring all spices are evenly distributed. This seasoned flour will be used twice in our double-coating process, so make sure you have enough for both applications.
Cooking Instructions
Step 4: The Double-Coating Technique
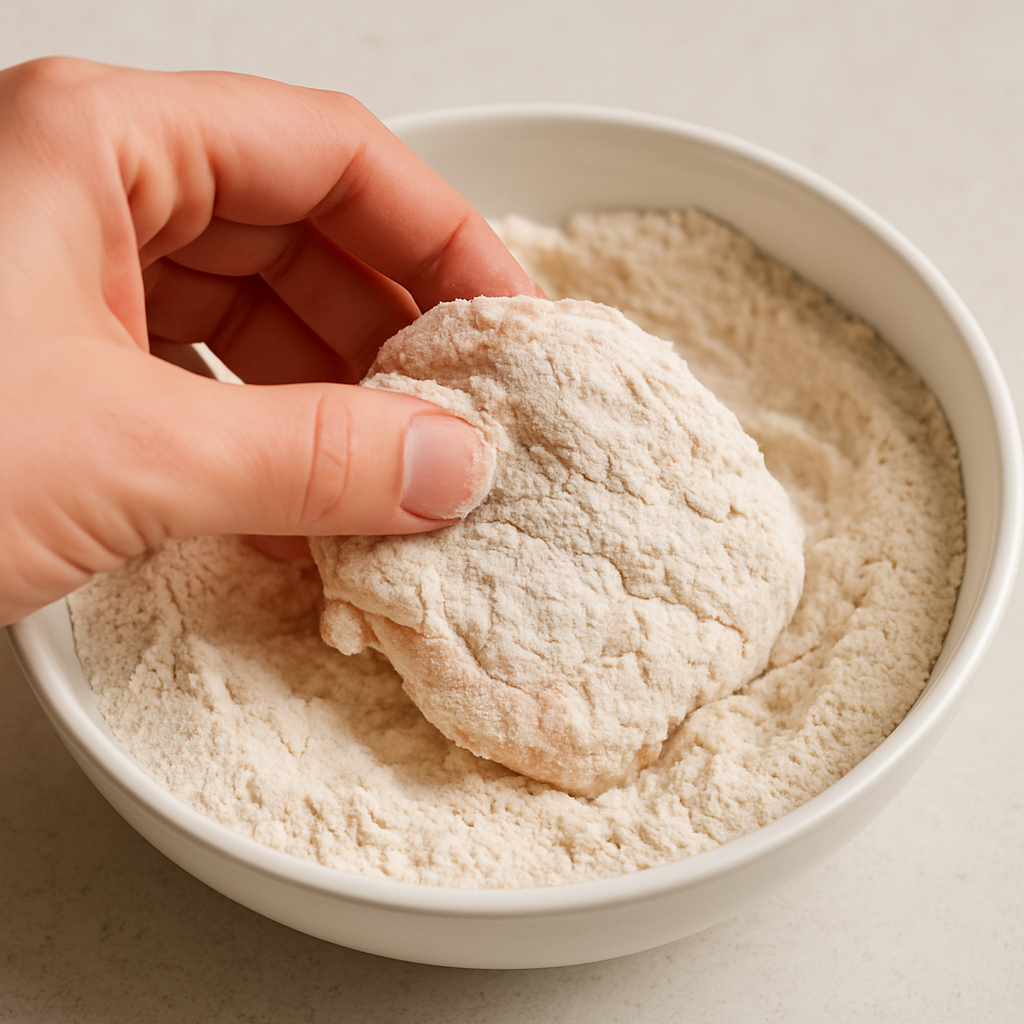
Remove the chicken from the buttermilk marinade, allowing excess liquid to drip off but not patting completely dry – you want some moisture to remain for the flour to adhere properly. Working with one piece at a time, dredge each piece thoroughly in the seasoned flour mixture, pressing gently to ensure the coating adheres to all surfaces, including crevices and joints.
After the first coating, dip the floured chicken back into the buttermilk mixture briefly, then immediately return it to the flour for a second coating. This double-coating technique creates the signature thick, craggy crust that makes restaurant-style fried chicken so irresistible. The second layer of flour will create those coveted crispy bits and bumps that provide textural contrast.
Place the coated chicken pieces on a wire rack set over a baking sheet, allowing them to rest for 15-20 minutes before frying. This resting period allows the coating to set and adhere more firmly to the chicken, reducing the likelihood of the breading falling off during cooking.
Step 5: Achieving Perfect Frying Temperature
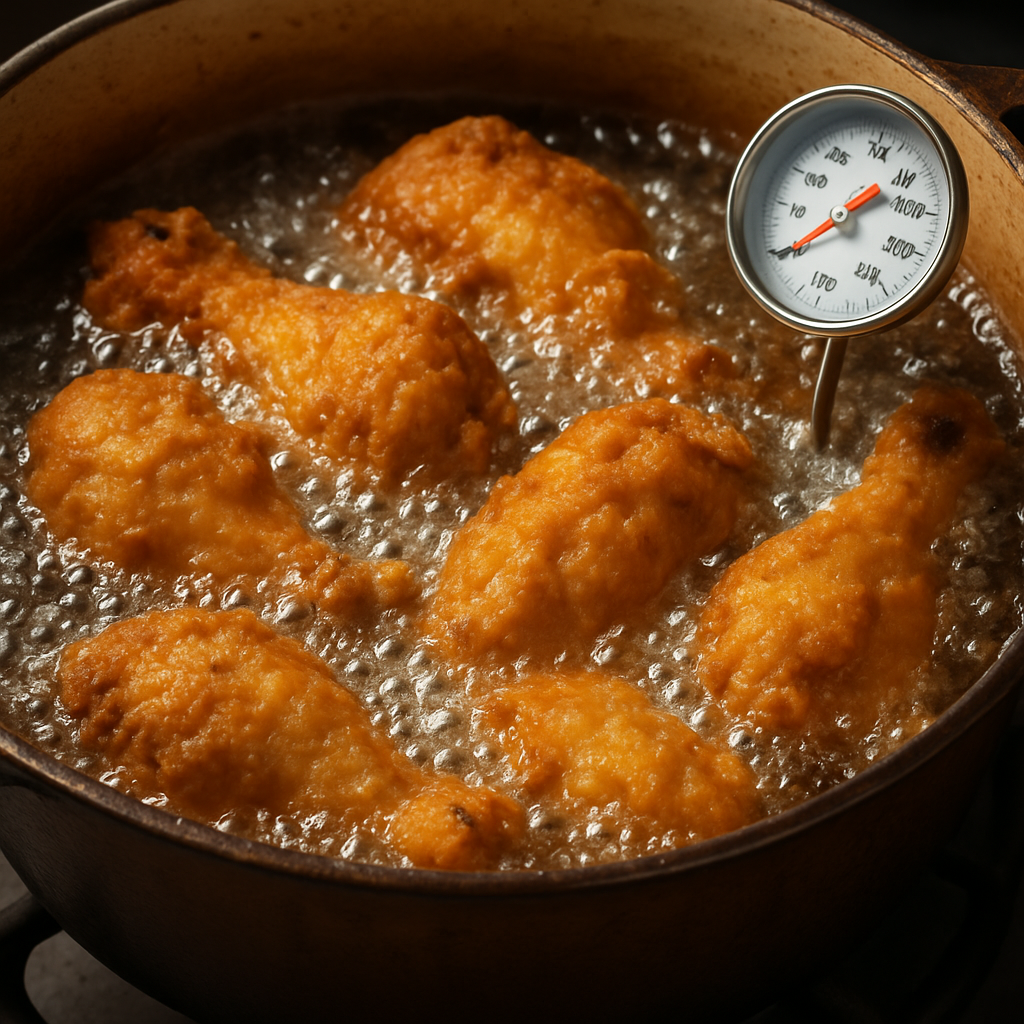
Heat your oil to exactly 325°F (163°C) in a heavy-bottomed pot or deep fryer. This temperature is crucial – too hot, and the outside will burn before the inside cooks through; too cool, and the chicken will absorb excess oil and become greasy. Use a reliable thermometer to monitor the temperature throughout the cooking process.
The oil should be deep enough to cover the chicken pieces by at least an inch, but never fill your pot more than halfway to prevent dangerous overflow when the chicken is added. Peanut oil is ideal due to its high smoke point and neutral flavor, but vegetable oil works well too.
Step 6: The Frying Process
Carefully lower the chicken pieces into the hot oil, starting with the largest pieces first as they’ll take longest to cook. Don’t overcrowd the pot – fry in batches if necessary, as too many pieces will lower the oil temperature and result in greasy, unevenly cooked chicken.
Fry the chicken for 12-15 minutes for smaller pieces (wings, drumettes) and 15-18 minutes for larger pieces (thighs, breasts), turning once halfway through cooking. The chicken is done when it reaches an internal temperature of 165°F (74°C) and the coating is deep golden brown and crispy.
Monitor the oil temperature throughout cooking, adjusting heat as needed to maintain 325°F. The temperature will drop when chicken is added, so be prepared to increase heat slightly to compensate.
Step 7: Draining and Resting
Remove the cooked chicken from the oil using tongs or a slotted spoon, allowing excess oil to drain back into the pot. Transfer the chicken to a wire rack set over a baking sheet, which allows air to circulate around all sides and prevents the bottom from becoming soggy.
Season the hot chicken immediately with a light sprinkle of salt while the coating is still glistening with oil – this ensures the seasoning adheres properly. Allow the chicken to rest for 5-10 minutes before serving, which allows the juices to redistribute and the coating to set to perfect crispiness.
Serving Suggestions and Storage
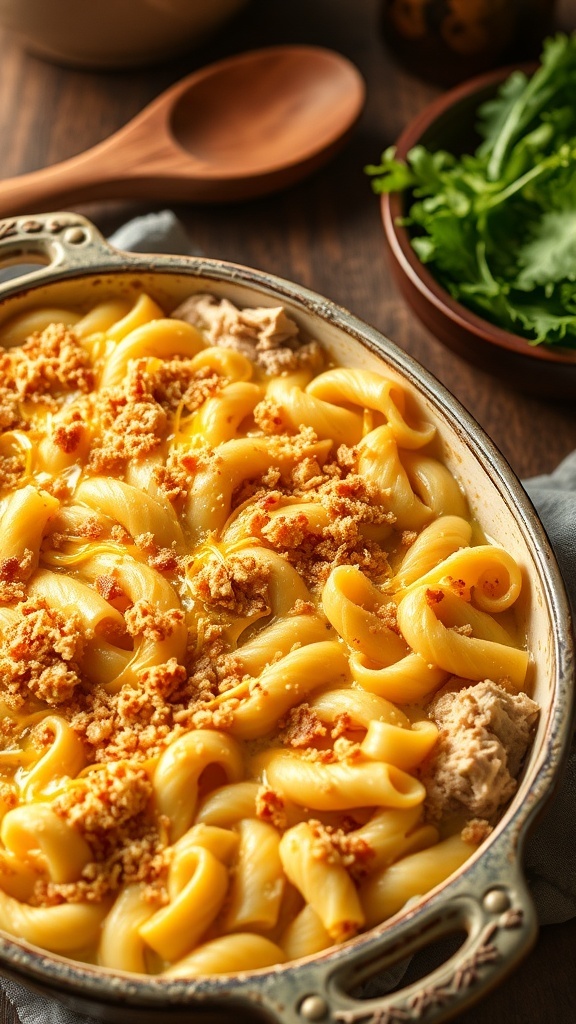
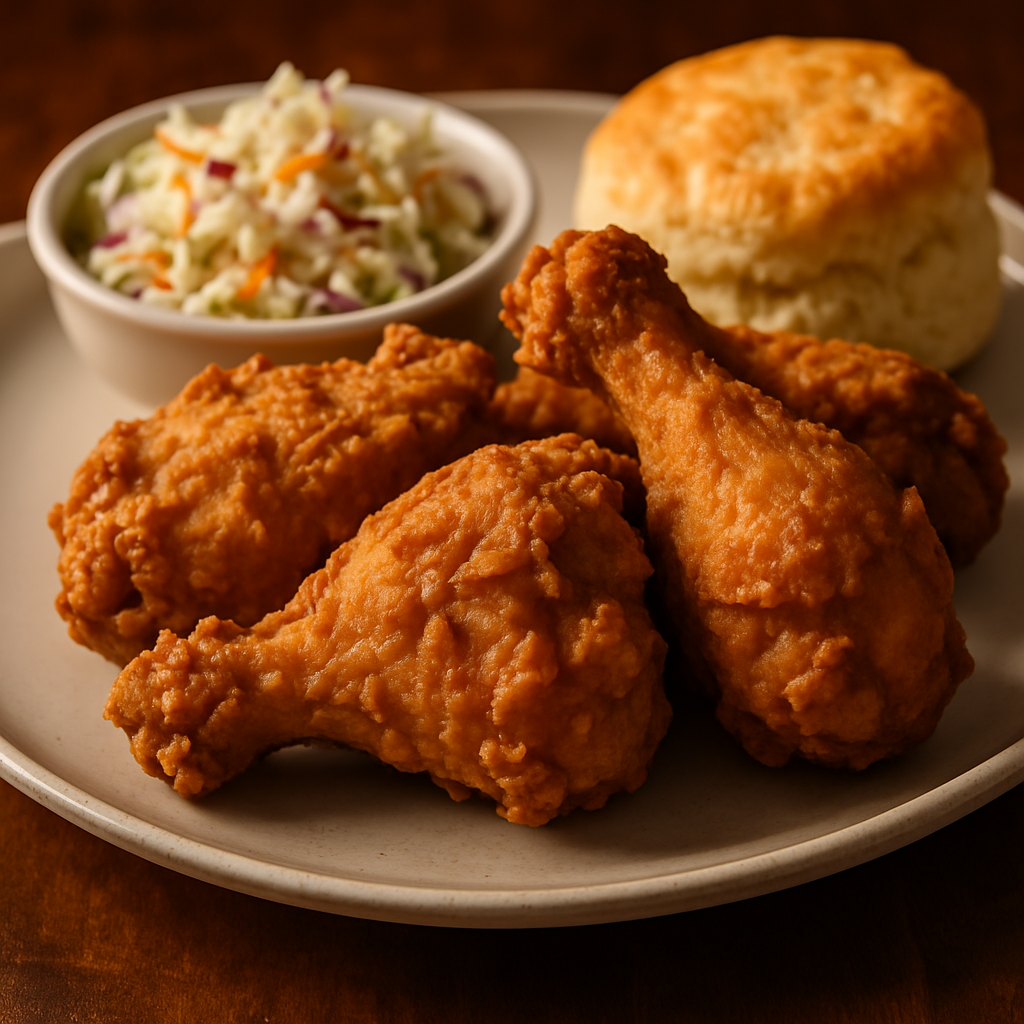
Serve your perfectly fried chicken immediately while it’s at its crispiest peak. Classic accompaniments include creamy coleslaw, buttery biscuits, mashed potatoes with gravy, mac and cheese, or fresh corn on the cob. For a lighter touch, consider serving with a crisp green salad dressed with buttermilk ranch or honey mustard dressing.
Leftover fried chicken can be stored in the refrigerator for up to 3 days and reheated in a 350°F oven for 10-15 minutes to restore some of its original crispiness. Avoid microwaving, which will make the coating soggy.
This recipe serves 4-6 people generously and can easily be doubled for larger gatherings. The key to success lies in patience – don’t rush the brining and marinating steps, maintain proper oil temperature, and resist the urge to overcrowd the pot. With these techniques mastered, you’ll create fried chicken that’s crispy, juicy, and absolutely irresistible.